How To: Declutter Your Cookbook Collection

declutter_your_cookbooks-01

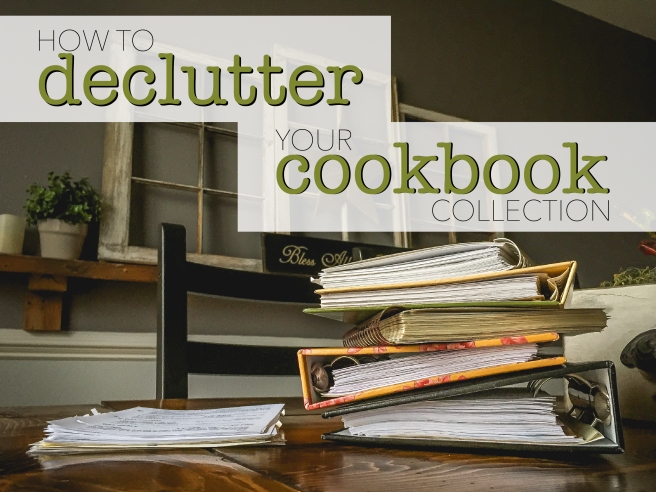
How many cookbooks do you currently have in your home? I’m being serious – go count them! My bet is that you have FAR more than you realize. I just counted and we have 42 (yes, FOURTY-TWO. And that doesn’t include the 5 you see above) plus our HUGE binder full of family recipes and favorites we’ve collected over the last few years. It’s ridiculous. Let’s be honest: there is no way that we will ever, in a million years, try all of those recipes, even once.

In an effort to purge some stuff and clear some things out in our home for the new year, we’ve been going through bookshelves (we have a serious book problem, and an even BIGGER mug collection addiction!) and closets –  donating anything we can, and throwing out the things that nobody has any business holding onto.

A couple of days ago a certain cookbook caught my eye and I had a revelation!

I’m not going to lie, it was a church cookbook. One given to us by someone, from a church that we knew nobody from. It’s a HUGE book and takes up a lot of shelf space. And can we be real here – how many of those recipes are you actually going to try? Don’t get me wrong, I have bought them from our churches in the past and I love the people that shared their recipes, but… 12 recipes for chicken pie, 7 recipes for meatloaf and 42 million mayonnaise based dips are just not things I’m going to ever make. My Nannie’s chicken pie and mom’s meatloaf are the only ones of those I’m interested in. Not because they’re necessarily the best, but I just don’t have room in my life for 9 different chicken pies! (Although I do have 3 that I really love – that are all pretty different…) Regardless of how much I love those people, I don’t need 90% of the recipes in there.

So here’s how I decided to make the best of both worlds: I sat down and took a few minutes to flip through the afore-mentioned church cookbook, pulling out pages that contained recipes that were something I found interesting and wanted to possibly try one day. I marked the recipe I was saving with a red star since there are usually multiple ones on each page. Once I had torn out the pages I wanted to keep I recycled the remainder of the book – and I don’t feel bad about it either.

Here’s Why:

1) My shelf has free space on it.

2) I kept recipes I’d love to try one day.

3) Recycling helps the enviroment.

4) Those cookbooks are organized as fundraisers, and my funds were given. The cookbook has officially served it’s purpose.

5) With a 125 page cookbook, I’m never going to sit down and read through it to find a recipe anyway – so with it on the shelf it’s literally doing me no good. Now that I’ve picked my favorites out, I’ll be more likely to try those recipes!

6) Best of all, I came across some really cool recipes that I didn’t know we had! (I found one for “Betty’s Coconut Cake” that looks like it could quickly become one of my favorites!)

After the first book I sort of found my “declutter calling” for the day and went through several more cookbooks to save the recipes we’d be interested in! We’ve placed those in our main recipe binder and look forward to trying them soon!

I highly recommend taking the time to glance through a few cookbooks that have been weighing down your shelves, in hopes that you’ll be able to free up a little more space in your kitchen! (If you’re feeling bad about tearing pages out, make copies or take photos of the recipes – but hey, tearing pages is find of fun!) I did over the last couple of days and have been able to recycle 5 cookbooks.  We have free shelf space and ended up with 25-30 new recipes to try!

Sharon’s Ultimate Peanut Butter Pie

pb_pie_web

Let’s talk about THE best Peanut Butter dessert that one could ever eat – Sharon Pope’s Famous Peanut Butter Pie! The thing that makes this pie far superior to all others is one important fact: it MUST be eaten warm – preferably minutes out of the oven.

I know, I know. Eating a hot pie goes against almost everything you’ve ever known. I thought the same thing when Sharon first told me – but trust us on this one… It will change your life! (Don’t get me wrong, this pie is pretty rockin-awesome at room temperature too, but when it’s hot and ruining all over the place… Well, it’s an experience you don’t want to miss out on!)

So, without further a due – the recipe that will soon become your favorite…

SHARON’S ULTIMATE PEANUT BUTTER PIE

For the Crust:

1.5 cups all-purpose flour

1/2 tsp. salt

9 tbs. shortening

5-6 tbs. ice water

Directions: In a large bowl, combine the flour and salt. Add the crisco and “cut” the shortening into the flour. (I like to use my fingers and hands – you want the crisco to end up in little bits, about the size of a green pea.) Then drizzle the ICE water onto the flour mixture and mix well. (You want the mixture almost as damp as play dough – but not too wet. It will still be a little clumpy, but will hold together when pressed with your hands.) Press together into a ball, then turn the crust mixture out onto a WELL floured surface. Using a rolling pin, roll the mixture out to about 1/8 inch in thickness. (Try to keep the crust moving while you’re rolling by using the rolling pin to spin it a little – you don’t want it to stick to the counter.) Once the crust is rolled out to the right thickness, roll it up on the rolling pin and transfer to the pie dish. After fitting the crust into all the edges of the dish, trim the excess dough off the edges with a knife – leaving a little over an inch hanging off. Then fold the remaining inch of crust under the edges and crimp using your left thumb and pointer finger on the outside and your right thumb on the inside. This gives you that attractive edge!

Using a fork, pierce the crust about 10-15 times (to release moisture while cooking) and bake at 350 degrees for 15-20 minutes. If the crust doesn’t seem to be golden after 20 minutes or so, turn the broiler on and get a little color on it. Be careful not to burn the crust at this point – keep a good eye on it!

Tip: This crust recipe is actually 1.5 times more than the original recipe, but I have my reasons. First off, I’m not the best at keeping my crust from cracking a fair bit when I roll it out, so with extra I can usually just cut off the cracks after I put it into the pie dish. Secondly, I’m a huge stickler on things looking good, and with extra crust I have plenty on the edges to do a stunning crimp! Plus, there’s enough in this recipe that you’ll be fine for a deep dish pie too!

For the Filling:

The Peanut Butter Crumbles…

3/4 cup powdered sugar

1/2 cup peanut butter

Directions: Place in a medium bowl and mix together using a fork. They’ll be crumbles, of all sizes. (Try not to eat them all before you place them in the pie, please! :p) Set them to the side.

Tip: I add a little more of both ingredients because I prefer to have more peanut butter in the pie – but that’s just me:)


The Custard…

2/3 cup granulated sugar

3 egg yolks (save the whites for the meringue)

1 tbsp. AP Flour

3 tbsp. corn starch

1/4 tsp. salt

3 cups milk (2% or whole)

2 tbsp butter

1 tsp. vanilla extract (don’t measure, just pour a good ol’ dash in – you can’t add too much vanilla, ever!)

Directions: Place yolks, sugar, salt, flour and cornstarch in a bowl and whisk together well. Begin to add the milk, slowly at first, and whisk until combined. Place in a pot over medium heat. The goal is to thicken the mixture with heat until it’s the consistency of a custard/pudding. You can do this in the microwave (which Sharon taught me) by heating the mixture in 30 seconds intervals and stirring it in-between to make sure it doesn’t curdle and scramble the eggs. I prefer to do this on the stove top – but that’s just me. Either way, keep a watch on it! On the stove, I bring it almost to a boil and that’s when the flour and cornstarch do their thickening work! After it’s thickened, pull off of the heat and add the butter and vanilla, whisk to combine, then grab a spoon and taste it – best stuff ever! (Again, as with the peanut butter crumbles, try to leave some for the pie filling, please! :p)


For the Meringue:

3 egg whites

1/4 cup granulated sugar

3/4 – 1 tbsp flour (I’ll explain below)

Directions: Place the egg whites in a bowl and begin beating with a mixer. (Using a whisk attachment if you have one) After they’re starting to turn white and a little foamy, begin adding the sugar slowly. Then beat the egg whites to stiff peaks.

Tip – sometimes, especially on humid days, it’s hard to get egg whites to hold their peaks. My mom taught me years ago that if you’ll add just a touch of flour to your egg whites and whisk it in well, it will help stabilize them when they cook and they’ll hold their peaks better!

Final Assembly: 

Place 1/2-3/4 of the peanut butter crumbles on the the bottom of the cooked pie crust. Top with all of the custard mixture (but don’t over over-fill the crust. You can always snack on the left over custard later!). Spread the meringue over the custard and top with the remaining peanut butter crumbles! Place back into the 350 degree oven for 15-20 minutes to cook the meringue and brown the top of the pie.

Pull out and serve within the first hour to fully enjoy. Like I said before, this pie is WONDERFUL at room temperature, but it truly is a life changing experience when it’s served warm! I’d let it cool for about 10-15 minutes to make sure you don’t burn your tongue completely off though… 🙂

I truly hope that you make this recipe with your friends and family for years to come. It’s recipes like this that hold so much meaning for me. Sharon, who shared this recipe with me on my 22nd birthday, is one of my dear friends from my time in Arkansas and we have made so many memories in her kitchen with our friends over the last several years. Every time I make this pie, I feel like Sharon is right there in the kitchen with me – laughing and acting like a total loon… And that’s what makes this SUCH a special recipe to me!

Take the time to create memories with those you love over recipes like this one… Not only will you feed the body, but more importantly you’ll feed the soul!

Happy Eating!

Coffee Mug Feature: Old City Coffee – Philadelphia

old_city_coffee_philadelphia_jordan_tickle_web1

Today’s “mug feature” goes out to this cool dude we picked up on our trip to Philly a couple of weeks ago. We were hired by a super cool couple to come up that way and shoot their wedding (check it out here) and decided to hang around for a few extra days to check out the city! What a trip we had…

While walking through Reading Terminal Market I scored several killer cups of coffee from Old City Coffee, along with other delicious foods, so when this vintage-beauty-of-a-mug caught my eye I knew it was the mug for me. It made the flight home and has successfully been by go-to mug for the last couple of weeks. It’s the perfect size and keeps my cup of brew nice and warm. So, that’s why this awesome dude win’s the mug feature today!

For those of you that might not know, Heather and I tend to be “mud hoarders.” Well, maybe not hoarders, per say, but we really, really, REALLY love coffee mugs! (The addiction started with me, and I quickly won Heather over.) I haven’t counted them in over a year, but know that our cabinet is stacked full of them, and there’s a box in the storage building with more than 35 inside… We aren’t key chain or t-shirt people, but we ARE coffee mug people. Therefore we usually grab a mug from anywhere we visit, but it doesn’t stop there. If we see a super rad mug, we pick it up. The cooler and quirkier the better! One of the cool things about coming to our house for coffee is that you get to pick any mug you want, and there’s always one to match whatever mood you’re in.

Share photos with me of YOUR favorite coffee mug in the comments!

Next Day Potatoes

next_day_potatoes

Today’s post isn’t really much of a “recipe,” but more of a tip! We’re talking about transforming leftover baked potatoes into a delicious side dish for your next meal – and it’s far easier than you might think.

Baked potatoes are one of those simple and delicious foods that practically everyone loves. They’re great with steak, chicken, barbecue, soups, chili, etc. – the possibilities are endless! While they’re wonderful, I tend to have two problems with them. First off, they take about an hour or so to cook and I don’t always have that kind of time during the week when we’re busy. Secondly, I always seem to have extras left in the fridge that just sit there for several days until I throw them out. I feel like it’s such a waste, but other than re-heating them I never know what to do with them.

Last night we had baked potatoes with supper, and I had two left… What to do, what to do? An idea hit me, so I cut them into chunks and threw them in the fridge for the night. Today when it came time to fix lunch I simply threw them into a pan over med-high heat with a little butter, garlic powder and dried chives – and sautéed them for about 5-7 minutes until they were warmed through and had a little brown on them. We topped them with cheese and sour cream, and they were the perfect addition to our BBQ slider lunch. Seriously, they were delicious and oh-so-easy!

Next time you’re baking potatoes, throw a few extra in the oven and plan to make these Next Day Potatoes for your next meal! You will be surprised with just how simple they are. Oh, and don’t feel like you are limited to cheese and chives – throwing some onions or peppers in with them would be a wonderful idea. Maybe some jalepenos and pepper jack cheese if you like them hot, or some oregano, rosemary and parmesan if you’d like them to be italian. The possibilities are endless!

Not sure how to make the perfect baked potato? It could not be easier:

  1. Pre-heat your oven to 425°F.
  2. Wash you potatoes and pat dry. (Russets are the best for baking)
  3. Poke each potato 7-10 times with a fork.
  4. Place the potatoes on a foil-lined pan and drizzle with olive oil.
  5. Sprinkle salt and pepper very generously over the potatoes.
  6. Using your hands, smear the oil/salt/pepper mixture all over each potato.
  7. Bake at 425°F for 30 minutes, flip them over, and continue to bake for an additional 25-35 minutes – until done. (They should feel slightly soft when squeezed with a paper towel and a fork should penetrate it with ease. This will depend on the size of your potato, but start checking them after about 45 minutes of cooking.)
  8. Enjoy!

Mushroom Broth Bowl

mushroom broth bowl

This idea was born several months ago when Panera introduced their famous “Broth Bowls.” Heather and I were having lunch one day and I took the plunge to try something a little different from my Chicken Frontega sandwich. (Which is still my favorite!) I was blown away by the flavor that was packed into such an unassuming little bowl of broth and randomness!

Naturally, I set out on a mission to replicate it – and that’s a different blog post for a different day.

Either way, we enjoyed that broth bowl that day and it set a bit of a creative spark off in me that day. Over the last few months I’ve let broth bowls be my quick “go-to” meal when we are in a hurry or when we just want something that’s healthy and super soothing! (We’ve been fighting colds the last week, so it REALLY hit the spot tonight!)

Here’s the 411 on broth bowls… Create a really flavorful broth using chicken stock (or “Better Than Bouillon”), some veggies and seasonings – then add some grains and protein to round out the meal! Have fun making these your own.

Comment below – I would love to hear what combinations you come up with!

Printable Recipe PDF here: mushroom_broth_bowl

INGREDIENTS

  • 2c. White Quinoa
  • 6 c. Chicken Broth
  • 8 oz. White Mushrooms
  • 6 Chicken Tenders
  • 7 Artichoke Hearts (canned)
  • 1 can (15.5 oz) Red Kidney Beans
  • 1 Tbsp. Butter
  • 1/8 tsp. Ground Cumin
  • 2 cloves Fresh Garlic
  • Dash Crushed Red Pepper
  • Seasoning Salt to taste

COOKING DIRECTIONS 

• Cook your quinoa per package instrustions. (2 parts water to 1 part quinoa. Bring to boil, reduce to simmer. Cook for 15 minutes until water is absorbed. Remove from heat and let rest.)

• Slice the mushrooms and sautee them in butter over medium to medium/high heat for about 6 minutes. Add chicken broth, garlic, crushed red pepper, season salt and cumin. Bring to a boil.

• Taste the broth for flavor BEFORE adding the chicken for flavor. Add more of what you think it needs.

• Add chicken tenders to the pot, bring back to a boil, cover and reduce to a simmer. Cook for 15-20 minutes, until the chicken is done.

• Remove chicken to a cutting board, chop coarsley with a knife and add back to the broth.

• Cut the artichoke hearts in half.

• Rinse and drain red kidney beans, and add those to the broth – along with artichoke hearts.

• Bring everything back to a simmer and it’s ready to serve.

• Be sure to taste the final broth before serving, and don’t be afraid to add more seasonings if you think it needs it.

TO SERVE

• Place 1/4 of the quinoa in the bottom of the bowl, and ladel about 1/4 of the broth mixture on top. Top with sliced green onions! A quick squeeze of fresh lemon will add a little brightness to the flavor!

TIPS

• Get creative and try adding a few extra things to the broth mixture when you cook!

• Canned Garbanzo Beans (Chickpeas), Fresh Spinach, Cooked Barley, Wild Rice, Leftover Pasta (plain) etc.

• Don’t like mushrooms? Try substituting onions!

Gorgeous Gelato – Portland, Maine

gorgeous_gelato_maine_jordan_tickle_photo-1

Have you ever had gelato? I’m talking about REAL gelato… The kind made by a true Italian, daily, and sold just feet from where it all comes to life? Well tonight we did.

My wife and I are vacationing/road-tripping through a few states this week and tonight we’re in Portland, Maine. It’s a really cool town with TONS of character and lots of places to eat. (score!) After a truly disappointing lunch (you really don’t want to hear about it) we checked into our hotel and took a little break from exploring. We tried to search out places for supper, but with it being Labor Day several places are closed – so we decided to take to the streets and explore the city on our own. We wandered by the coolest small pasta place and enjoyed two plates of delicious home-made ravioli. I’m glad to report that our supper was a FAR better experience!  With such a rewarding find under our belts – and in our bellies – we decided to explore dessert options. (because everyone knows you always need dessert when you’re on vacation) While walking through the historic cobblestone-lined streets we ran across a couple of ice-cream places and two gelato shops. After looking in the windows we decided gelato was going to be our sweet choice for the night. We proceeded to walk past Gorgeous Gelato and discuss whether we should indulge there or across the street at another gelato company. When a lady on the sidewalk overheard us she immediately told us that we were just steps from truly THE BEST gelato we would ever have.

Heather had a scoop of Coconut and a scoop of Dark Chocolate, and I had a had a scoop of Panna Cotta Caramel and Dark Chocolate. Boy, oh boy, was that lady outside on the sidewalk right! It was perfect… Absolutely decedent!

Everything was on point – the atmosphere, the staff, the location, the gelato, the prices… And even the paint colors were great! This was seriously one of the best finds I’ve ever run across for something sweet! (I’m pretty sure we’re going back in the morning when we check out of the hotel for an espresso! And maybe I’ll see if Heather will let me get mine “affogato” style – over a little scoop of gelato!)

If you’re ever in Portland, Maine you MUST stop by for a scoop (or more) of the best gelato! DuVine actually just rated GG the #1 gelato in America!  gorgeous_gelato_maine_jordan_tickle_photo-5gorgeous_gelato_maine_jordan_tickle_photo-3gorgeous_gelato_maine_jordan_tickle_photo-2gorgeous_gelato_maine_jordan_tickle_photo-4gorgeous_gelato_maine_jordan_tickle_photo-6gorgeous_gelato_maine_jordan_tickle_photo-7

Quinoa Quiche Tots

quinoa_quiche_tots_JTP_cooks-3

Quinoa has been quite the star of the “health food” stage for a while now, and rightfully so! These little grains (seeds, really) are packed with more protein and fiber than most of the other popular grains in today’s “superfood” race. I could ramble on and give you statistics about how healthy quinoa really is, but that’s what good-ol’ Google is for. If you don’t know much about quinoa, then definitely take some time to research it and see just how good it really is for you. You can buy it at any supermarket, it cooks just as quickly as most rices or pastas do, and it’s insanely versatile!

There are “a million and one” ways to make delicious dishes using quinoa, (like Quinoa Enchilada Casserole) but this recipe caught my eye online about a week ago and I wanted to see if it was actually worth making. The ingredient list is pretty short and that’s always an attractive thing! The recipe also doesn’t include any unhealthy items, so I figured that it was worth a try because if it was something I liked then I’d be making a lot more of them for breakfast or mid-morning snacking because they were easy AND healthy! (We all know that hitting up a granola bar around 10am get’s old after a while!)

I’m happy to report that I made the tots today! They’re delicious and we’re excited about finishing the rest of them for a quick breakfast in the morning! I found the original recipe over on Nutrition Twins and I’m so glad they shared it with us – but y’all know I love to make things my own. So, I made a few modifications to make the tots a little more appealing to my tastebuds and I really think it improved the final product. Take a few minutes to whip these tots out and see what you think of them. They’re a GREAT addition to your breakfast or snack stash and they’re WAY healthier than actual “tater tots!” (not that I really think they replace classic tots)

Printable Recipe PDF here: quinoa_quiche_tots

INGREDIENTS

  • 1/2 c. Quinoa (uncooked)
  • 4 Egg Whites
  • 2 Egg Yolks
  • 3 Tbsp. Grated Parmesan Cheese
  • 1/4 tsp. Seasoning Salt
  • 1/8 tsp. Garlic Powder
  • 1 tsp. Diced Onion (dried or fresh)
  • Pepper to taste
  • 1/2 c. Chopped Mushrooms
  • 1 c. Chopped Spinach
  • 1/4 c. Diced Fresh Tomatoes

DIRECTIONS

• Cook the quinoa, per package directions and let cool for 5 minutes.

• Beat eggs in a large bowl until well mixed, then add Parmesan cheese and thoroughly mix.

• Add the quinoa to the egg mixture a little at a time to “temper” the eggs so they don’t scramble with the hot grains. Mix well.

• Add the salt, garlic, onion and pepper. Mix well.

• Add the diced vegetables and mix.

• Spray a mini-muffin pan (I use a 24 count pan) with oil or non-stick spray and divide the mixture evenly among the cups using a large tablespoon.

• Bake the “tots” at 350°F for 25-30 minutes, until they begin to brown.

• Let cool 5 minutes to help set and bind the tots, before serving. Store any leftovers in the refrigerator.

TIPS

• You can create your own flavor combinations by adding any vegetable combination you think you would enjoy! I’m sure bacon or ham would be delicious additions!

• Try broccoli, cheddar cheese and red onion – or maybe a southwest version with diced bell peppers, tomatoes and some crushed red pepper flakes! (Or maybe a drained can of Rotel)

• Customize these to be something you enjoy!

quinoa_quiche_tots_JTP_cooks-4 quinoa_quiche_tots_JTP_cooks-2 quinoa_quiche_tots_JTP_cooks-1

Rustic Peach Tart

rustic_peach_tart_jordan_tickle-2I love peaches, and I’m proud of it! I literally have an obsession with anything peach-flavored and it’s slightly out of control. I’m a little late posting this recipe because things have been CRAZY around here lately, but just a couple of weeks ago we were right in the middle of peach season here in NC and I was in heaven!

There’s a small, family owned and operated, peach orchard about 25 minutes from my house and they have THE BEST peaches you’ll ever find! I get some every year to make things with and it’s one of my favorite times of the entire summer. We froze a bunch, made several rounds of jam, ate more than I can remember and made a few of these tarts! It was wonderful… I enjoyed every second of it too!

This recipe came about from a late night search for “easy peach recipe” one night while Heather was at work. I’m really bad about wanting a little something sweet at night – and having all these peaches in the house just wasn’t helping! (Plus I hadn’t baked anything in a while and I kind of wanted to get out the flour and make something) This recipe sounded pretty easy and rather simple, so I gave it a whirl!

And boy-oh-boy, I’m sure glad I did!

The original recipe came from Syrup and Biscuits and I’m so glad they shared it, but I changed the recipe just a little. I’m currently trying to reduce our sugar intake in recipes just because there’s no reason to consume extra sugar – plus I LOVE fresh peaches, and I wanted the natural sweetness to come through more. If you like things pretty sweet then feel free to double the sugar. Also, I use brown sugar instead of regular sugar to give a deeper flavor. Another thing – I adapted my original pie crust recipe by substituting one tablespoon of Crisco for room temperature butter. This is a little trick that Alton Brown suggests and it really made my crust delicious. The butter adds a little flavor to the crust, but the Crisco keeps it light and flakey. This was honestly the best pie crust I had ever eaten – no joke!

Printable Recipe PDF here: rustic_peach_tart

RUSTIC PEACH TART

INGREDIENTS

For the crust…

  • 1 c. All-purpose Flour
  • 5 Tbsp. Crisco/Shortening
  • 1 Tbsp. Butter (room-temperature)
  • 1/2 tsp. Salt
  • 3-4 Tbsp. Ice-Cold Water
  • *Milk, Cream of Half & Half
  • *Granulated Sugar

For the filling…

  • 4 c. Sliced Peaches – Fresh or Frozen (if using frozen, thaw and drain first)
  • Juice from 1/2 lemon
  • 1/4 c. All-purpose Flour
  • 1/2 c. Brown Sugar
  • 1/2 tsp. Ground Cinnamon

DIRECTIONS 

For the crust…

• Mix flour and salt in a bowl. Add Crisco and butter and cut into the flour with a fork until about the size of peas. Add ICE COLD water 1 Tbsp. at a time and mix until the dough just starts to come together.

• Press dough into a ball and turn out onto a well-floured surface. Using a rolling-pin, roll the dough until about 1/8 inch thick. Don’t worry about form and shape – it’s rustic!

• Lightly dust with flour to make sure it won’t stick, and roll up on your rolling-pin. Transfer to a cookie sheet lined with parchment paper. Easily unroll onto the parchment.  (Do NOT skip using parchment paper. It sticks terribly to the pan and is a pain to clean!)

For the filling…

• Mix the flour, sugar and cinnamon together in a small bowl. Mix the peaches and lemon juice in a large bowl, then toss with the flour/sugar mixture.

• Pour the filling into the middle of the crust and spread the peaches evenly, leaving at least 2.5 inches of crust around the edges. Fold the edges of the crust around the peaches.

• Brush the edges of the crust with milk or cream and sprinkle with granulated sugar.

• Bake at 375°F for 55-60 minutes, until the crust is golden brown.

• Serves 4-6 people, depending on how large of a slice you want!

rustic_peach_tart_jordan_tickle-3

Oven-Baked Potato Soup

easy-oven-baked-potato-soupI have a little confession to make – I can’t really take credit for this soup. This recipe is one that my wife has talked about for two years! She finally found it again and insisted that she make it for me. I read the ingredients and I gave her the “you’ve GOT to be kidding me” look. She just smiled and walked into the kitchen – then patiently began to craft this soup and prove me wrong! (Yep, I admitted it – I was wrong. But just this once! And you better not tell her either!)

This soup is creamy and rich – but not too rich! It has FAR more flavor than you would anticipate and it’s literally one of THE easiest potato soup recipes you will ever come across. The idea for this soup comes from a local restaurant where my wife grew up in VA. They have made this type of potato soup for years and the locals just can’t get enough of it – so naturally Heather had to take me by there to grab a bowl. It really was delicious! I’m glad she found this recipe again, and I’m even glad she proved me wrong! (See, I even admitted it a second time!)

Do yourself a favor and make this soup tonight! I promise your tongue, your stomach and your family will thank you!

OVEN-BAKED POTATO SOUP

INGREDIENTS:

  • 2 cans Cream of Potato Soup (10.5 oz.)
  • 2 cans Sliced or Diced New Potatoes
  • 2 c. Half and Half (I use fat-free)
  • 1/2 c. Milk
  • Salt and Pepper to taste

DIRECTIONS:

  • Mix your cream of potato soup with your milk in a mixing bowl, then add your half and half. Make sure it’s combined well.
  • Sprinkle in your salt and pepper – mix well.
  • Add your canned potatoes (drained) and mix thoroughly.
  • Pour mixture into a 9×13 baking dish and place in a 375ºF oven for 35-45 minutes, until it’s bubbling and just starts to brown a little.
  • Remove from the oven and divide into bowls. Top with as much chopped bacon, cheese and chives/green onions as you can handle!
  • If soup is all you’re having, this will feed two quite comfortably.

TIPS:

  • Go ahead and splurge for the name brand soup with this one. I feel that there’s a pretty big taste difference with the cream of potato soups – but maybe that’s just me.
  • The canned potatoes don’t matter – they all taste the same. We actually like one can of diced and one of sliced to mix things up a little.
  • If you’re having guests over, I’d easily double the recipe! This stuff is SERIOUSLY good! (Just make sure to increase your cooking time. Make sure it’s heated through very well – maybe even give it a stir half-way through)
  • Play with the recipe – add some garlic or diced onion to jazz it up
  • I think you will be pleasantly surprised with the flavor that a can of cream of potato soup will bring to the dish – I know I sure was!

To see more of my photography, check out my website: http://www.jordantickle.com


Tip: Better Than Bouillon

jordan_tickle_photography_better_than_bouillon-8

Everyone knows that broths can come in handy for recipes. It’s got way more flavor than water and can help build flavor while you’re cooking your dish. I always used to keep a few cans or a carton of the stuff on hand to make sure that I never ran out – that was until I found this stuff. Better Than Bouillon changed my life! I’ve yet to buy canned or boxed broths since I ran across this liquid gold.

These bases can be purchased at just about any store that sells groceries. It’s cheaper than broth and takes up a lot less space in your kitchen. Oh – and the main reason I use it – it has TONS more flavor than any broth you can buy! Just use one tablespoon per cup of hot water. Mix to dissolve and use just like you would regular broth.

(Oh – and when you’re almost done with the jar, pour hot water in and seal with the lid. Shake and swirl to dissolve the remaining base and add to whatever you’re making! “Waste not – want not,” right?)

Better Than Bouillon comes in over 10 delicious flavors, including Chicken, Beef, Shrimp, Mushroom, Chili, etc. There’s a base for just about anything you need to make! I’m telling you, it’s amazing stuff – you need a few jars in your kitchen!

Stop spending extra  money on canned broths, and switch to Better Than Bouillon’s flavor bases – your tastebuds with thank you!